There is a lot of debate among miniature painters about the best way to prime miniatures. Some people swear by one method, while others claim that another is far superior. So which is the right way to do it? Priming your miniatures is essential for achieving good results, but there are various ways. In this article, we’ll explore the different methods of priming miniatures so that you can decide which one is right for you.
Applying primer to your miniatures is essential to ensure an even and consistent paint job. Without primer, the paint can pool in crevices and uneven surfaces, resulting in an unsightly and rough finish. The most common methods are spraying, painting, and dipping.
A primer on your miniatures is essential for a smooth, even paint finish. We will now break down the different types of primers available and how to apply them so that you can get the best results.
What is priming?
Priming is the process of applying a primer to a surface before painting. Primers are a type of paint designed to create a smooth, even surface for painting. They also help protect the surface from dirt, dust, and other debris and prevent paint from chipping or peeling.
Various primers are available, including acrylic, enamel, and spray primers. Each type has advantages and disadvantages, so choosing the suitable primer for the job is essential.
Why is priming important?
Priming is essential because it provides a smooth surface for painting. It also helps the paint adhere better to the surface and prevents it from chipping or peeling. It will ensure your painting results are more consistent across your miniature collection.
Types of primers
There are several ways to prime miniatures, and each method has advantages and disadvantages. In this section, we’ll explore the most popular forms of priming miniatures.
Various ways to prime your miniatures include acrylic, enamel, and spray primers. Acrylic primers are ideal for beginners as they’re quick drying and easy to use. Enamel primers take longer to dry but provide a durable finish. Spray primers are convenient but can be tricky to use.
Acrylic primers
Acrylic primers are one of the most popular types of primers available. They come in spray and bottle form, dry quickly, and are easy to use. Acrylic primers also tend to be cheaper than other types of primers. However, they can sometimes be prone to cracking or bubbling and can be challenging to remove if you make a mistake.
Enamel primers
Enamel primers are another popular type of primer. They’re more expensive than acrylic primers but are also more durable and tend to provide a better finish. Enamel primers can be challenging to use, however, and they require a longer drying time.
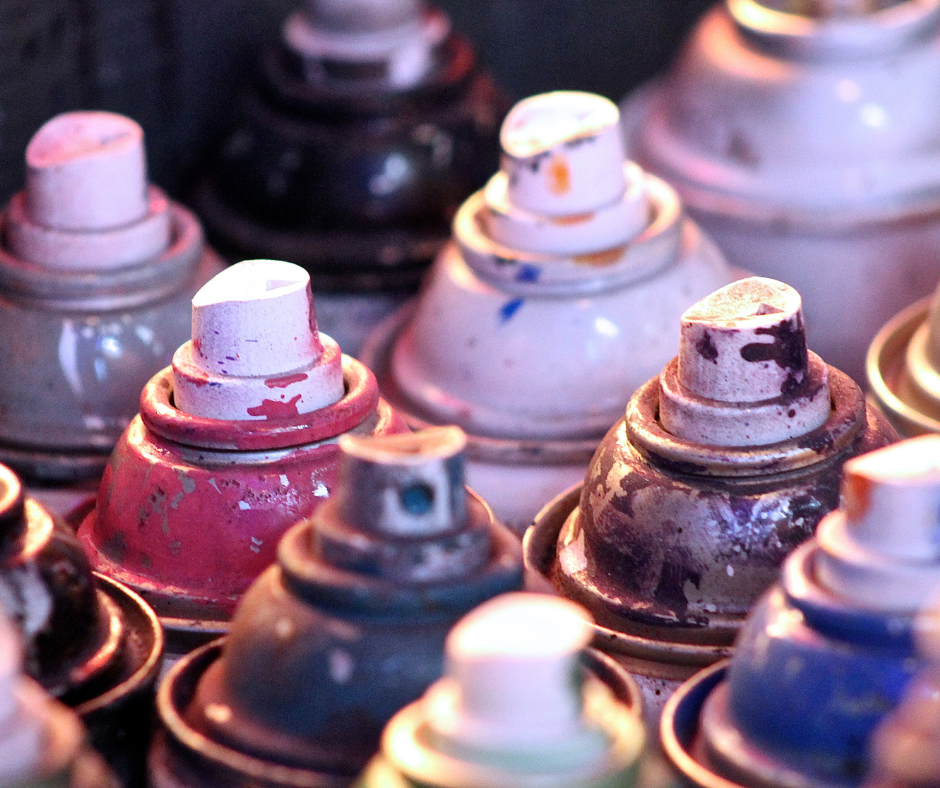
Rattle Can / Spray primers.
Spray primers are convenient and easy to use, but they can be more expensive than other types of primers. They also tend to provide a less even coverage than different types of primers.
What colour primer should you use?
The primer colour you use is essential for the finished product of your miniature. It is necessary to make sure that you choose the correct colour to allow your base colours and detail to stand out correctly. We also review the standard primer colours and the benefits and use cases.
Black Primer – Black is an excellent primer colour for darker colours. It will make your miniatures pop and really make the colours stand out.
White Primer – White is a versatile primer colour used for various projects. It’s perfect for light colours and provides good coverage.
Grey Primer – Grey is a great all-purpose primer colour. It works well for both light and dark shades and provides good coverage.
In the table below we have included common primer colour selections for different base coat colours. These are not definitive and your choice will be highly dependent on your desired finished product. Use the following rule:
Light Primer Colour = Lighter Base Colour
Darker Primer Colour = Darker Base Colour
| Common Base Colour | Primer Colour (Black, Grey, White) |
| Silver | Grey |
| White | White |
| Black | Black |
| Grey | Grey |
| Gold | White |
| Lighter Reds | White / Grey |
| Darker Reds | Grey / Black |
| Yellow | White |
| Lighter Blues | White / Grey |
| Darker Blues | Grey / Black |
| Green | Grey / Black |
Nowadays, we benefit from an extensive list of primers on the market and are not limited to the primary colours above. You can often cut out a lot of work for yourself if you find the perfect primer colour for your project. For example, if you were to paint a Warhammer Ultra Marine, you can grab an ultramarine blue primer. This gives you the benefits of priming your miniature and allows you to skip the base coating step for your models.
Why create more work for yourself when you can solve two steps in one—priming and base coating both at the same time. Job done!
Best Primers For Miniatures
Citadel Colour Primer
This primer is available in various colours, making it perfect for any project. It’s quick-drying and easy to use, making it ideal for beginners. Citadel Colour Primer provides good coverage and protects surfaces from chipping and peeling.
Rust-Oleum 2X Ultra Cover
This primer is available in various colours and provides excellent coverage. It’s quick-drying and durable, making it ideal for busy painters. Rust-Oleum 2X Ultra Cover is also resistant to chipping and peeling, making it an excellent choice for miniatures.
Krylon ColorMaster
This primer is available in various colours and provides good coverage. It’s quick-drying and easy to use, making it ideal for beginners. Krylon ColorMaster is also resistant to chipping and peeling, making it an excellent choice for miniatures.
How to prime miniatures
You will want to follow the steps below to prime your miniatures correctly and make sure the primed surface remains even and free of abrasions:
- Assemble your troops – prepare your miniatures for the priming by assembling your models from the packet.
- Add the bases – glue the bases to your miniatures.
- Dust and debris – remove any dust or debris from the surface of your miniatures with a brush or compressed air. This will ensure that the primer adheres to the surface evenly
- Place your miniatures on a suitable surface – once your models are fully assembled, it is time to prime them. Place your models on a surface that can be easily cleaned, like a piece of cardboard or newspaper.
- Secure your miniatures in place – you don’t want your models moving around while trying to prime them. Use putty, Blu-Tack, or similar products to secure your models.
- Get outdoors – if possible, take your models outside to prime them. The fresh air will help ventilate the area and remove fumes from the primer. It would help if you never primed your miniatures in an unventilated area.
- Shake the primer can – give the primer can a good shake to mix the contents thoroughly. Shake for 30 seconds to a minute to ensure the can is primed.
- Apply the primer – hold the primer 20-30cm from the surface of your miniature and spray evenly. Continue until the entire surface is covered.
- Short bursts and shake – avoid holding the nozzle down for too long as this will result in a heavy coat of primer. It is also essential to shake the can regularly to prevent clogging and ensure an even coat of paint.
- Don’t touch your miniatures – once you have finished priming your models, it is essential not to handle them or try to move them until the primer is completely dry.
- Let the primer dry – once you have applied it, let it dry completely before moving on to the next step. Depending on the primer you’re using, this could take anywhere from 30 minutes to 24 hours.
- Start painting! – once the primer is dry, you can start painting your miniatures. Congratulations, you’ve primed your models and are ready to paint them however you like!
Applying primer
Before applying primer, make sure that the surface is clean and free of debris. If necessary, sand the surface lightly with fine-grit sandpaper to create a smooth base. Once the surface is prepared, shake the primer can or bottle well and apply the primer according to the manufacturer’s instructions.
If spray primer is used, hold the can 20-30cm away from the surface and apply a light, even coat. Avoid applying too much primer as this can cause pooling or dripping. If you’re using brush-on primer, apply a thin layer of primer with a paintbrush. Work in small sections and avoid brush strokes.
Once the primer is applied, allow it to dry completely before moving on to painting. Depending on the primer used, this can take anywhere from 30 minutes to several hours. We suggest waiting 24 hours until you start painting your miniatures.
Tips for getting the best results
No matter which method you choose to prime your miniatures, some tips will help you get the best results.
Clean the surface first: It’s essential to clean the surface of your miniature before applying primer. This will remove any dirt, dust, or other debris that could interfere with the primer’s ability to adhere to the surface.
Use a release agent: A release agent is a substance that prevents the primer from adhering to the surface of the miniature. This can be helpful if you’re concerned about making a mistake while priming.
Apply primer in thin layers: It’s essential to apply a primer in thin, even layers. If you use too much primer, it can cause problems like bubbling and cracking.
Let the primer dry completely: Always let the primer dry completely before painting over it. Otherwise, the paint may not adhere correctly or may appear streaky.
Frequently Asked Questions
What conditions should you prime your miniatures in?
The best conditions for priming miniatures are warm and dry. If it’s too cold, the primer may not dry correctly. The primer can take longer to dry if it’s too humid or may not adhere perfectly.
Can you paint miniatures without primer?
You can paint miniatures without primer, but it is not recommended. Primer provides a smooth base for the paint to adhere to and helps the paint colours pop. It also protects the miniature from chipping and peeling.
How long after plastic primer can I paint?
It’s best to wait 24 hours after plastic primer before painting. This will give the primer time to cure and create a smooth base for the paint.
Is it possible to remove primer?
You can remove primer from miniatures. However, it can be difficult and time-consuming.
What type of primer should I use for metal miniatures?
It’s best to use a primer suitable for metals, in most cases you can use the same primers for your plastic and metal models. To avoid paint chipping, it is always a good idea to varnish your metal miniatures.
How do you remove primer from miniatures?
If primer is accidentally applied to too much of the miniature, it can be removed with methylated spirits. Soak a cloth in methylated spirits and rub it gently over the primer until it is released. Be careful not to get the methylated spirits on the paint as this can damage it.
You may need to soak the figurine in the methylated spirit for a few minutes before trying to remove the primer. If the cloth is not taking off the primer on its own, you can use a soft-bristled toothbrush with the methylated spirits. Be careful when carrying out this activity to avoid damaging your miniatures.
What is the best primer for miniatures?
Many different primers are available; the best one depends on your needs. If you’re looking for a primer that dries quickly and provides good coverage, Krylon ColorMaster is an excellent choice.
Does primer colour affect paint colour?
Primers do affect the final paint colour of your miniature. Darker primers provide a deeper, darker finished model. Lighter coloured primers will show through the paint colours more. If you want to achieve a light finished model, use a white primer.
Always test your primer on a spare piece of painting material before using it on your miniature to see how the colour will turn out.
How do you store primer?
Primer can be stored in its original container. Be sure to screw the lid on tightly to prevent the primer from drying out. You can also store primer in an airtight bag or container. You will want to keep your primer in a cool, dry place to prevent it from clumping or drying out.
What is the best way to clean up primer?
The best way to clean up primer is with a damp cloth. Wipe down the area where you applied the primer to remove any excess. You can also use methylated spirits to remove primer from surfaces.
So there you have everything you need to know about priming your miniatures! By following these tips, you’ll be sure to create beautiful, professional-looking models that impress your friends and family.
Final Thoughts
Now that you know more about priming miniatures, you can decide which method suits you. Experiment with different techniques and products to find the best work for you. With a bit of practice, you’ll be able to create beautiful, primed miniatures that will stand out from the crowd!